Planning on tackling a project in your home? One that requires a more hands-on approach than a simple task?
If you’re expanding your home, knocking down walls, or hanging something up that can’t survive on Command hooks, then it’s time to learn about wall studs.
These pillars of support for your home can have shelving, TV mounts and other things mounted on them that the drywall just can’t handle.
That being said, it’s important to know what wall studs can and cannot do. Let’s go over everything you need to know about wall studs.
Contents
- 1 What is the Purpose of Wall Studs?
- 2 Properties of Wall Studs
- 3 Types of Wall Studs
- 4 Stud Grading
- 5 Stud Materials
- 6 How to Find Studs in a Room
- 7 Manual Stud Finder vs. Digital Stud Finder
- 8 Why Smartphone Stud Finders are Garbage
- 9 Can Wall Studs Rot?
- 10 How Much Weight Can Wall Studs Hold?
- 11 Can I Mount a TV in Wall Studs?
- 12 You’re a Stud Expert Now
What is the Purpose of Wall Studs?
Think of wall studs as the bones of your home.
A wall stud is designed to hold your wall material in place to form rooms, as well as holding in window frames, and often door frames as well.
Wall studs are the support of your home that undergo pressure from load-bearing portions of your home.
Fortunately, you have a lot of wall studs in your home all working together, which is why we can mount something through a wall stud if need be and not immediately damage the structural integrity of our homes.
Wall studs may be used to hold up non-load-bearing walls as well.
During renovations or remodels, some walls between two spaces may be removed to create an open floor plan, if the architect deems that structural integrity of the home viable enough to support the wall weight without these studs present.
Non-load-bearing studs may be removed to increase space, though it’s often not recommended to do this.
Some wall studs can be transformed into support beams to open up a space or make them aesthetic if they are still necessary for structural integrity.
Properties of Wall Studs
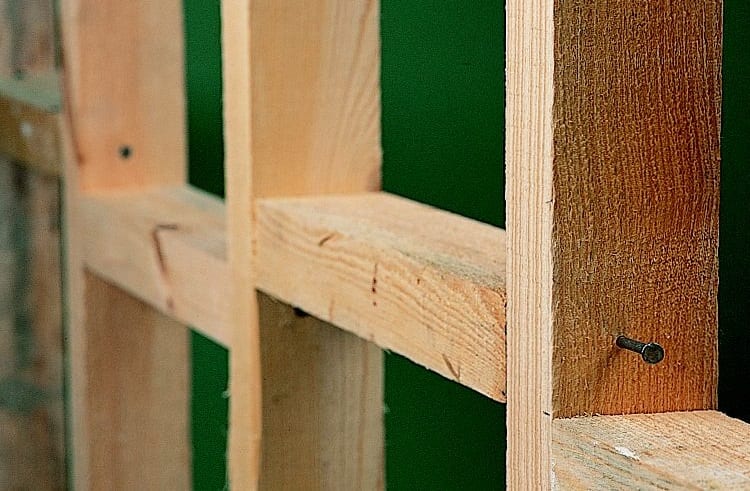
Wall studs tend to be called 2×4 or 2×6 boards.
Even though the dimensions of these boards have changed over time, this is still what we often call them. Wall studs may be anywhere from 92” up to 16’ in height, and actually be 1.5” by 3.5” in total.
Most wall studs are made out of Douglas fir, or spruce wood.
These are sturdy enough to be used in light framing and construction, but aren’t hardwood varieties, so you aren’t spending an absolute ton of money to frame a home or add an extension onto your current house.
Ironically, even though we deal in 2×4 and 2×6 wall studs, the actual dimensions are 1.5” x 3.5” and 1.5” x 5.25”, in most cases.
Types of Wall Studs
Believe it or not, it’s just not based on stud size: there are different types of studs for various purposes in construction.
Studs are part of framing, so prepare to see some cross terms here. In total, there are five studs, and two sub-category studs, for a total of seven that you should know about.
1. Saddle Studs
These studs create the bottom portion of window openings in framing. These are generally not advised to drill into.
Saddle studs may also be called sill studs. While you can drill into them, they’re generally so low that it doesn’t provide any utility.
You’re not going to mount a TV beneath your window, and you’re not going to block a window by bolting a cabinet to the frame.
2. Cripple Studs
Header studs support the weight of the building above it, but in order to have your header studs actually take effect, you need cripple studs.
These studs sit 16” apart between the top plate of your wall, and the header studs, providing stability and alignment for the entire frame of the home.
3. King Studs
In framing, you have what’s called a rough opening. The spaces in your rough opening are defined by the king studs.
These extend from your top plate down to the sole plate. There’s specific spacing that you need here, because it has to accommodate jack studs.
4. Jack Studs
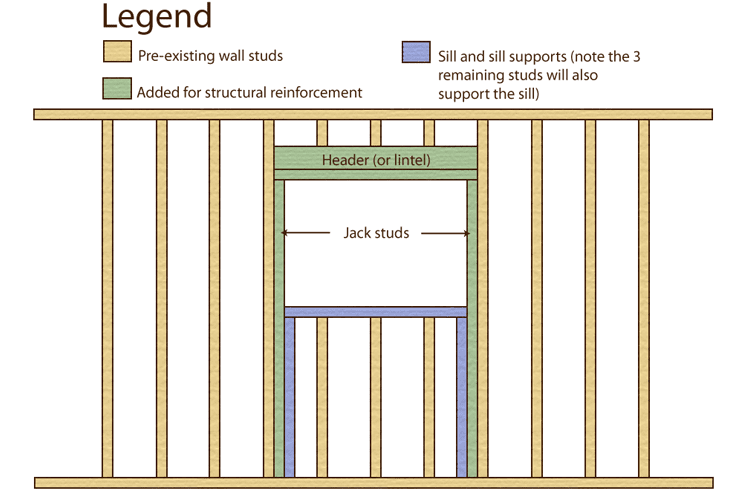
Jack studs attach to the sides of your king studs. Jack studs always face the opening of a window or a door. Jack studs run vertically, just like king studs.
5. Headers
Headers act as the head of a window frame, and sometimes a door frame. These horizontal studs run between two king studs, with cripples and saddles on the top and bottom.
These help support windows more than anything else.
6. Floor and Wall Joists
You’ll see floor joists in mobile homes that have been placed in a permanent location more than anywhere else.
These beams sit about 12” to 16” away from each other, and actually support the floor, the base of your walls, and the weight that your furniture holds.
7. Ceiling Rafters
These are pretty obvious: the beams that go along the top of your basement ceiling, and the ones that are in your ceiling right now between your first and second floor.
These may not exist in single-story homes. Ceiling rafters are usually made up of 2” x 6” solid boards, though they may also be made up of three separate 2” x 4” boards that are connected together.
Stud Grading
Studs are just lumber, and there are different lumber grades that you should be aware of in construction.
That being said, studs, rafters and joists aren’t the only thing you’re doing during a construction project.
When it comes to stud, there is one grade of lumber designed for studs: stud grading. I’m not making this up: there’s literally only one grade of lumber you can choose for this.
It can derive from different sources, but altogether, it has to fit a certain criteria of sturdiness, thickness, and dimensions in order to be considered stud grade.
Stud Materials
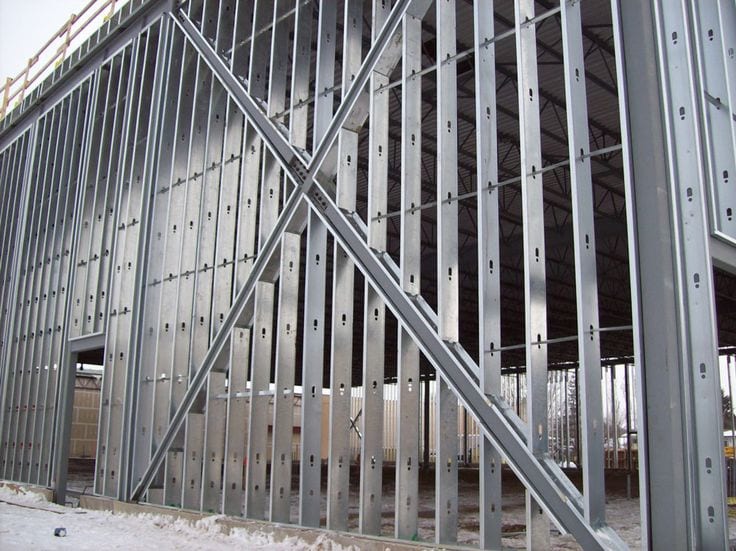
Studs can be made up of different wood grades, though there are a few that shouldn’t be used for building whatsoever.
Douglas fir and spruce wood are generally used in inexpensive framing for homes, and you’re not going to make studs different from other framing structures.
Studs can also be made up of steel, brick, and even concrete, though for obvious reasons (cost and time), those aren’t viable options.
They also wouldn’t allow you to drill anything into them without specialized equipment and screws.
How to Find Studs in a Room
Start with an electronic stud finder, and scan the wall accordingly.
Most studs are 16” apart, so once you’re able to find the first one, it’s going to be much easier to locate the rest in your room.
That being said, they’re not always spaced 16” apart. That’s why you need a stud finder in the first place. Turn on your electric stud finder, and select which scan option you want.
Just about every electronic stud finder on the market comes with four to five modes. These include light scans, which go 0.5” to 0.75” below the surface of your wall.
The reason that these aren’t always enough is that most drywall is already 0.5” in depth, so the studs might be just a hare’s breath away from a detectable range.
This isn’t always the case, since wall materials can come in different sizes, but it’s a possibility you need to accept.
That’s where deep scans come into play. These often go down to 1.5” of detection for thicker walls, and can be useful in certain scenarios.
If you want to find studs in a room, you should use a stud finder. If one isn’t available to you, that’s okay, there’s another way.
Based on the fact that studs are only apart by a short distance, you can put your ear up to the wall, and tap it with the back of your knuckle.
Do you hear a hollow sound?
Due to insulation, it might not sound super hollow, but if there’s some level of echo, it’s probably not the stud. You can do this, moving inch by inch along the wall, until you hear a solid stop.
The knock will vibrate for less time, because there’s something solid behind it to absorb those vibrations. This doesn’t tell you where the dead center of the stud is, but it’s pretty close.
If you’re able to find a stud on your own, measure the distance between that stud in the next if you don\’t have a stud finder.
This will most likely be the same distance between every single stud in your home.
Manual Stud Finder vs. Digital Stud Finder
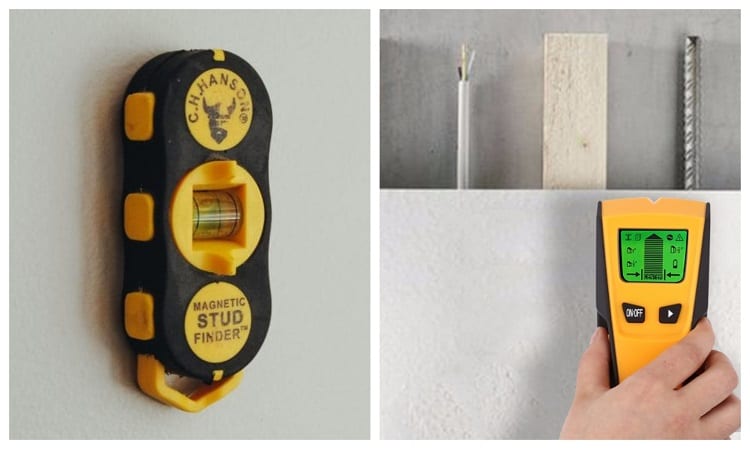
Manual stud finders are fairly archaic, and while they can work well, they don’t leave your walls unscathed.
A manual stud finder is a long, rivet-like piece of equipment that has a needle sticking out from the bottom end.
You’re supposed to have a good understanding of where studs are, and how they’re spaced (usually 16” apart).
With that knowledge, identify where you believe studs would be. You then take the needle on the end of the stud finder, and gently press it into the wall.
If the needle goes all the way through, you’re just in the drywall. If it hits something solid, then it’s most likely a stud.
This leaves some pinholes in your wall, but you also have to get different manual stud finders depending on what you’re searching for.
Some stud finders are designed just to go through wallboard, while others are designed for drywall.
So why does everyone opt for an electronic stud finder instead?
Well, for one, you don’t have to damage your property in the hopes that you’re right. Not all studs are 16” apart, even if they should be.
You can sometimes find them 12” up to 18” apart, depending on the age of the build or how thorough the contractor was during construction.
Electronic stud finders use magnetic or electronic sensors to look through your walls to detect studs, so there’s no damage to the actual drywall.
Electronic stud finders generally require a 9V battery, but nearly all magnetic stud finders require zero power: they just operate on the magnets.
Electronic stud finders are the easiest and most reliable to use, next are magnetic stud finders, and lastly, I wouldn’t even recommend using a manual stud finder if you can avoid it.
Why Smartphone Stud Finders are Garbage

The camera in your smartphone is not a depth sensor. It cannot detect studs through the wall in the same way that an actual stud finder can.
You’ve probably seen a ton of ads for these apps by now, especially after looking up this guide. If you’re curious, grab a free app, and try it for yourself.
It’s not about the app. It’s not about the interface. It’s about the lack of hardware in a smartphone.
Your smartphone isn’t going to come with the proper sensors to detect studs.
Inside of your stud detectors, there are either electric or magnetic methods of finding studs. In recent years, electronic stud finders have taken over, although magnetic stud finders are still in use.
These pack different hardware than what your phone carries. Smartphone stud finders are terrible, unless it’s an attachment that clips onto the back of your phone.
However, these have sensors built into them and act as full stud detectors, but end up costing you two to three times the price of a standalone stud finder. It’s not really worth it at that point.
Can Wall Studs Rot?
Yes. Just like any other portion of the framing or foundation in your house, wall studs can be subject to rot.
In more humid climates, this can happen rather quickly if you don’t have a good infrastructure on your home.
Wood rot doesn’t discriminate. That being said, wall studs can also be the victim of termite infestations, making your home unsafe.
It’s a good idea to have a full, in-depth home inspection every three to five years (every year if you can afford it), because problems like wood rot and termites can cost you four or five figures.
If you nip them in the bud, you can mitigate the costs. Certainly worth the $900-or-so you’d spend on a professional home inspector.
How Much Weight Can Wall Studs Hold?
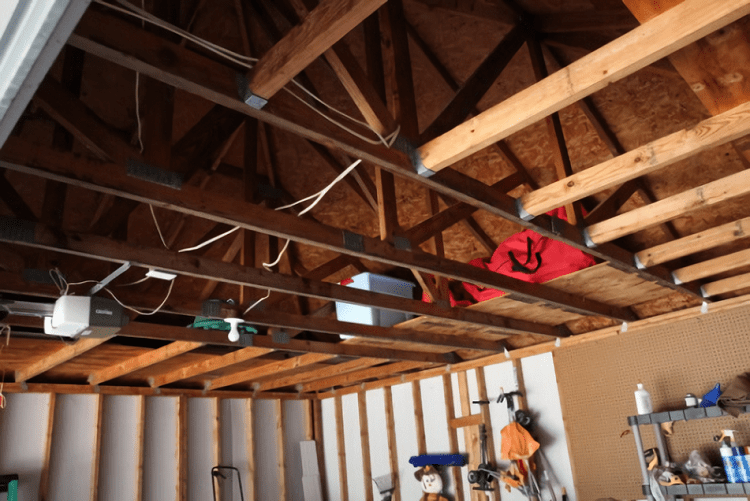
This is where it gets interesting. You can put so much weight and pressure on wall studs for a few reasons:
- They’re thick, sturdy pieces of wood with their own natural resistance.
- They work together in a full frame to evenly distribute weight when possible.
- Because they serve multiple purposes, wall studs support your home during storms and rough winds.
Basically, one single 2” x 4” piece of spruce can hold upwards of 2,800 lbs. Consider the fact that you have one of those every 16”, and there are a lot in a single room, supporting tens of thousands of pounds.
It’s not quite so easy, though. That weight budget through tens of thousands of pounds is used up by the ceiling, roof, attic, potential second and third floors, and so on.
Your frame has to be made perfectly straight to withstand all of that load-bearing weight, which is why when small collapses in structures happen, framing is cited as the issue since it can shift over time or be constructed improperly.
One stud. 2,800 lbs of compressed pressure. Thicker studs, or those of a higher grade of spruce, may hold even more weight.
The closer your studs are together (12” instead of 16”) can increase the total amount of pressure your room can handle.
Can I Mount a TV in Wall Studs?
Yes, you can.
While not all televisions need to be mounted through wall studs, many televisions can weigh in excess of 35 lbs.
Drywall isn’t made to withstand a ton of weight. You can move a coffee table and crack right through it with a bit of pressure and a sharp angle.
TV mounts can be used with wall anchors, however. These might need to be used to mount a few 2” x 4”s to the wall itself, which will then end up supporting your televisions.
Bottom line is that you can use studs, and if you want a seamless setup, then you should use your studs if you have a large, heavy TV, like a 70”+ curved television, which usually packs some extra weight.
Wall studs can handle being drilled into. You’re putting four or eight screws into a single stud, which does affect the structural integrity of the stud, but by a negligible amount.
If you are mounting a TV to a stud, you shouldn’t mount anything else to that specific stud.
You’re a Stud Expert Now
With everything you know about wall studs, you’ll be ready to mount that new television, monitor mounts, shelves, pictures, or anything else.
It’s important to know how the stability in your home works, how to be careful around it, and what it’s made of.
It’s going to impact the way you renovate your home no matter what; now you know.

